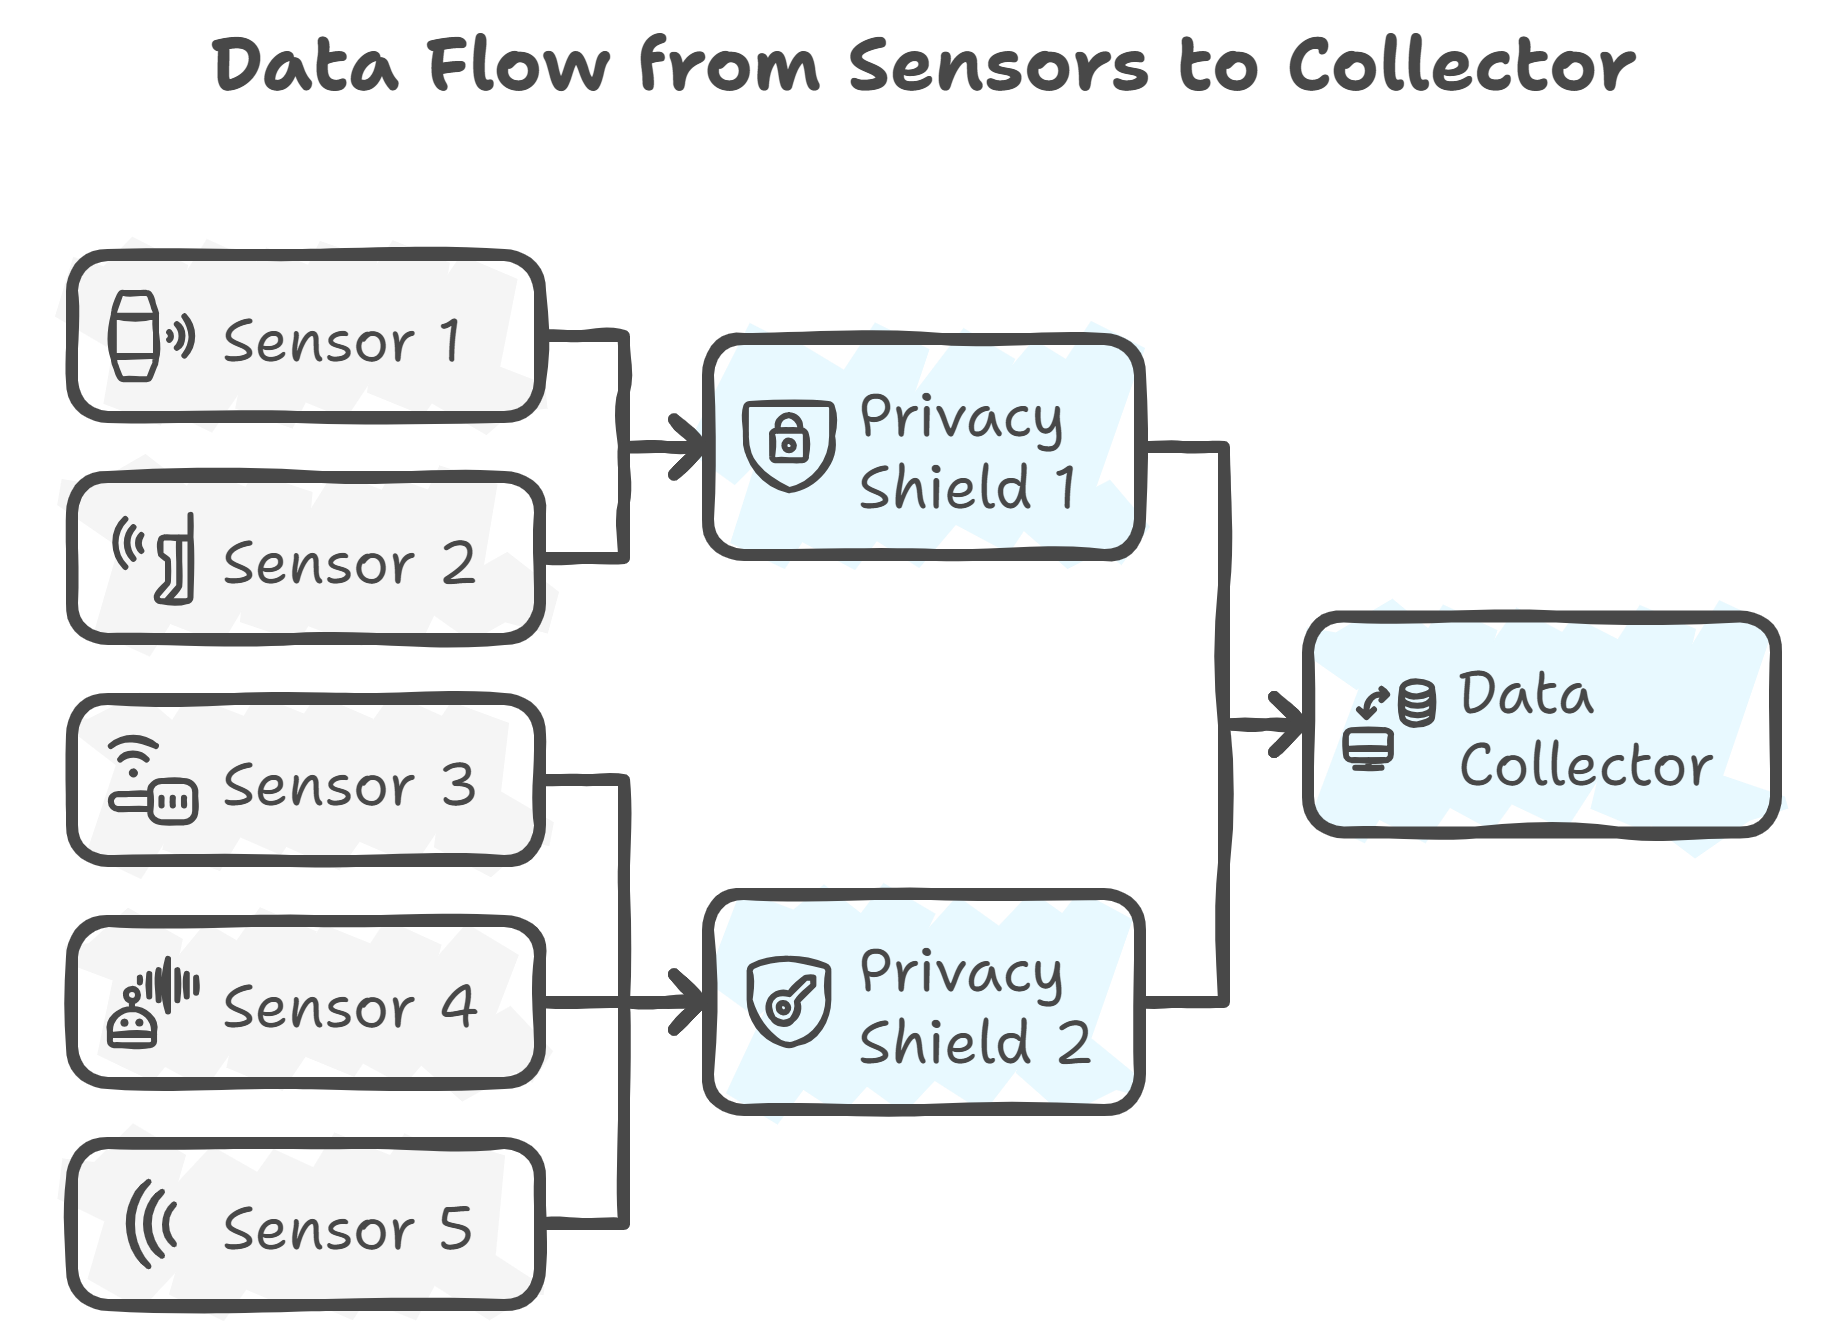
Sensors form the data collection layer of the pDNS service architecture and are responsible for forwarding passive DNS data to the Privacy Shield. These sensors are deployed across heterogeneous environments, ranging from desktop computers and servers to embedded systems. These platforms differ significantly in CPU capability, available memory, storage capacity, and supported software dependencies. As a result, a single sensor implementation would be inefficient or infeasible across all deployment scenarios.
To address this, multiple sensor implementations were developed and tailored for both resource-rich PC/server environments and resource-constrained embedded systems, such as network routers. This design ensures efficient operation across diverse platforms without compromising performance, reliability, or privacy guarantees.
To evaluate these design choices, different packet sniffing implementations were benchmarked and compared in terms of CPU load, memory usage, storage consumption, and traffic captured, as summarised in the table below
Performance of Each Sniffer
| Sniffer |
Load avg. |
Memory |
Storage |
Packets |
| Tcpdump |
0.03 |
~20MB |
~6MB |
16,894 |
| Native passivedns |
0.06 |
~36MB |
~10MB |
9,528 |
| Python script |
0.38 |
~104MB |
~16MB |
3,103 |
Sensors Used
PC/Servers (Python script)
The PC/server sensor was implemented in Python and serves as the primary platform for development, testing, and full-scale deployments in resource-rich environments. As shown in the table above, the Python Scapy sniffer incurs higher CPU load, memory usage, and storage consumption compared to lightweight native sniffers. This overhead is primarily due to the Python interpreter and its associated libraries.
Despite this, Python was selected for its flexibility, extensive library ecosystem, and ease of debugging, which enabled rapid development and iteration of encryption, anonymization, and data transmission logic. In PC and server environments, where CPU, memory, and storage resources are readily available, these overheads remain acceptable and do not impact system stability or performance. As a result, the Python-based sensor is well suited for development, testing, and feature-rich deployments where maintainability and extensibility are prioritised.
Routers (Native passivedns)
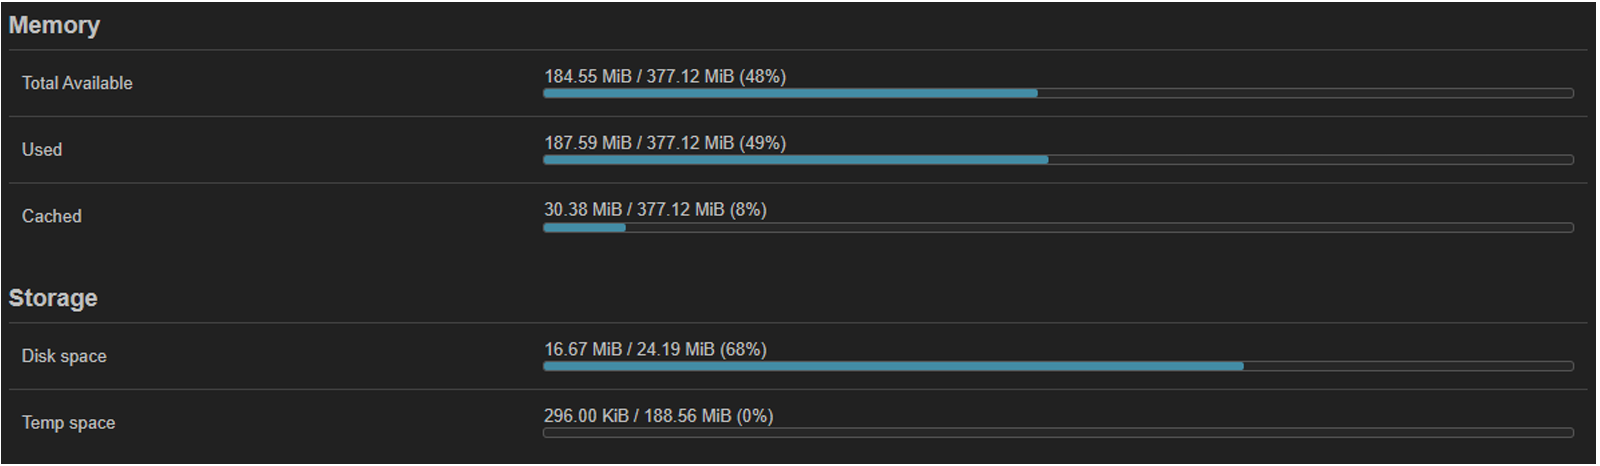
Routers are typically front-line devices that capture DNS traffic at the network edge. They operate in highly resource-constrained environments, often offering limited RAM, flash storage, and minimal software support. This is evident from the router configuration shown below, where only approximately 30 MiB of RAM and 7.5 MiB of storage remain available.
To accommodate these constraints, the router sensor was implemented as a compiled binary targeting the ARM64 (also known as AArch64) architecture. This approach eliminates the need for an interpreter or external runtime dependencies, significantly reducing both memory and storage requirements. The same code can be compiled for other architectures such as variants of MIPS32/MIPS64, RISC-V, as well as Intel/AMD
As reflected in the performance table, tools such as tcpdump and native passivedns exhibit substantially lower CPU and memory usage compared to the Python-based Scapy sniffer. These tools are implemented in C, a compiled language that is highly efficient and well suited for constrained environments. Their low overhead enables continuous packet capture on routers without degrading packet forwarding performance or system stability
In addition, packages like Tcpdump installed are extensively tested and maintained by official developers. They are optimized for performance, built with minimal dependencies, and free from unnecessary or redundant code that could introduce overhead. In contrast, open-source tools like native passivedns may include extra code for flexibility or extended features, which, while useful, can result in slightly higher resource usage and less streamlined performance
Summary
In conclusion, supporting multiple sensor implementations is necessary to ensure compatibility across a wide range of deployment environments. While Python-based sensors are suitable for PCs and servers due to their flexibility and ease of development, routers require lightweight, resource-efficient solutions (native passivedns). Since embedded systems typically lack a Python interpreter and operate under strict resource constraints, compiled C-based sniffers provide superior performance, lower memory usage, and greater compatibility. This platform-specific approach enables efficient and reliable pDNS data collection across the entire Privacy Shield architecture.